A dashboard warning light can turn an ordinary drive into a guessing game. Yet a rough idle, slow start, or soft brake pedal does not automatically mean a major repair. How to diagnose faulty auto parts at home begins with careful observation, simple checks, and a clear limit: home testing cannot replace professional inspection when safety is uncertain.
Automotive educator and textbook author James D. Halderman teaches systematic diagnosis. A concise summary of that approach—not a verbatim quotation—is: “Test before you replace.” That principle can save money and prevent a good part from being swapped unnecessarily. Note when the symptom appears, whether the engine is cold, and what changes when accessories run. Look for loose battery terminals, cracked hoses, fluid spots beneath the car, or a tire losing pressure. Small clues matter.
This guide will outline practical checks for common warning signs, including battery, lighting, tire, and fluid problems. It will also explain what basic tools can—and cannot—tell you. A code reader, for example, may identify a system fault without proving which component failed. Be cautious. Never work beneath a vehicle supported only by a jack, and stop if you find fuel leaks, damaged wiring, or brake problems. Sometimes the honest diagnosis is simply: get help.
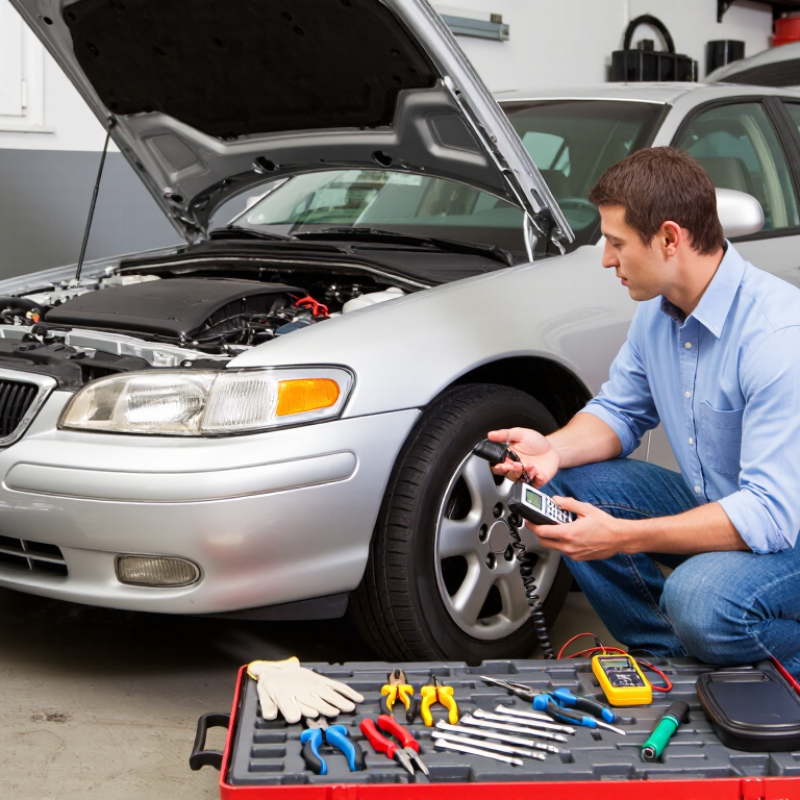
Before inspecting anything, park on firm, level ground and switch off the engine. Set the parking brake, remove the key, and let hot components cool. Let it cool. Keep children and pets away, and wear safety glasses and snug-fitting gloves. Avoid loose sleeves near moving parts. If you need to raise the vehicle, use correctly rated jack stands on approved support points; never rely on a jack alone. If the car feels unstable, stop.
Gather a bright flashlight, a tire-pressure gauge, a basic socket set, and a digital multimeter. An OBD-II scanner can read stored fault codes, but a code points to a system, not necessarily one failed part. Check the owner’s manual for safe test points and model-specific precautions. Keep tools dry, and place them on a clean cloth so small parts do not disappear under the car.
Start with a visual check while the engine is off: look for loose connectors, cracked hoses, fluid drips, or a visibly damaged belt. Do not reach near fans or belts, even if the engine seems quiet; some fans can start unexpectedly. I can be tempting to jump straight to replacing a suspicious part, but symptoms often overlap. Record what you see, and avoid probing unfamiliar wiring. A careful inspection may still leave the cause uncertain, and that is a useful reason to pause rather than guess.
| Step or Tool | Purpose | How to Use It | Safety Notes |
|---|---|---|---|
| Park and secure the vehicle | Prevent the vehicle from moving while you inspect it. | Choose firm, level ground. Shift an automatic transmission into Park or a manual transmission into gear, apply the parking brake, and switch off the engine. | Keep the vehicle away from traffic. Never rely on the transmission or parking brake alone when lifting a vehicle. |
| Allow hot parts to cool | Reduce the risk of burns from the engine, exhaust, coolant, and other hot components. | Wait until the engine and surrounding parts have cooled before touching or inspecting them. | Never remove a radiator or coolant-system cap while the system is hot or pressurized. |
| Wear basic protective equipment | Protect hands and eyes from dirt, sharp edges, and splashes. | Wear safety glasses and suitable work gloves. Tie back long hair and keep loose clothing away from moving parts. | Do not wear gloves, jewelry, or loose clothing near belts, fans, or other moving components while the engine is running. |
| Use wheel chocks | Help prevent a parked vehicle from rolling. | Place chocks snugly against the wheels that remain on the ground, especially before raising one end of the vehicle. | Use chocks on firm, level ground. Chocks do not replace correctly positioned jack stands. |
| Vehicle owner’s manual | Find vehicle-specific information and safe service points. | Check the manual for the correct fluid specifications, warning-light meanings, fuse locations, and approved lifting points. | Do not guess about fluid types, lifting locations, or service procedures when the information is available in the manual. |
| Flashlight and inspection mirror | Help examine dim, narrow, or hard-to-reach areas. | With the engine off, look for loose connectors, damaged hoses, worn belts, corrosion, leaks, or disconnected parts. | Keep hands and tools clear of fans and belts. Electric cooling fans can start unexpectedly, even after the engine is switched off. |
| Digital tire-pressure gauge | Check whether tire pressure matches the vehicle specification. | Measure pressure when tires are cold and compare the readings with the placard on the vehicle or the owner’s manual. | Use the vehicle’s specified pressure, not the maximum pressure printed on the tire sidewall. |
| Digital multimeter | Measure basic electrical values such as battery voltage and continuity. | Set the meter to the correct measurement mode and range. Follow the meter and vehicle manuals when testing battery terminals or circuits. | Do not measure resistance on an energized circuit. Avoid shorting battery terminals with probes or tools. |
| OBD-II code reader | Retrieve diagnostic trouble codes from compatible vehicles. | With the vehicle safely parked, connect the reader to the diagnostic connector and record the codes before clearing anything. | A code points to a detected condition; it does not by itself prove that a particular part has failed. Do not use a handheld reader while driving. |
| Basic hand tools | Allow simple visual access or tightening where appropriate. | Use correctly sized screwdrivers and wrenches for accessible, low-risk tasks identified in the vehicle manual. | Do not loosen fuel lines, high-voltage components, airbag parts, or pressurized systems without proper training and procedures. |
| Notes and symptom log | Keep observations organized and help identify patterns. | Record warning lights, diagnostic codes, noises, smells, leaks, when symptoms occur, and whether the engine is cold or warm. | Stop the inspection and seek qualified help if you find fuel leakage, smoke, exposed wiring, or a serious brake or steering problem. |
Park on firm, level ground, switch off the engine, and set the parking brake. Let hot parts cool. Wear safety glasses and snug gloves, and keep children and pets away.
A flashlight, tire-pressure gauge, socket set, and digital multimeter are useful. An OBD-II scanner can read fault codes, but a code does not identify a failed part by itself.
Note the date, mileage, weather, engine temperature, speed, and driving conditions. Describe the symptom precisely, such as “metallic rattle over bumps.”
Record whether the issue occurs during a cold start, after a long drive, or on wet roads. Patterns may help distinguish recurring problems from one-time annoyances.
With the engine off and cool, inspect hoses, belts, wiring, tires, and visible suspension or brake parts. Look for cracks, bulges, frayed edges, leaks, and loose connections.
Not necessarily. Clear water near the front may be normal air-conditioning condensation. Check its location and appearance, but avoid touching hot or pressurized components.
Yes. A tire may lose pressure slowly without obvious damage. Check its pressure, tread, sidewall, cuts, bulges, and valve stem.
Note its location and photograph it. Do not force corroded fittings or disconnect safety-related wiring. A flickering light or intermittent start may have a simple cause, but inspection cannot confirm it.
How to diagnose faulty auto parts at home begins with preparing the vehicle safely: park on level ground, switch off the engine when appropriate, and gather basic tools such as a flashlight, gloves, and a tire-pressure gauge. Before inspecting anything, note the symptoms and when they occur, including unusual sounds, warning lights, leaks, or changes in handling. These details can help narrow down which systems may need attention.
Next, look for visible damage, loose connections, worn components, or fluid leaks, and use simple checks to assess common issues without taking apart unfamiliar systems. Compare your observations with the vehicle’s manual, and avoid touching hot or moving parts. If the cause remains unclear, the problem involves safety-critical components, or a test requires specialized equipment, stop and seek professional diagnosis. Careful observations can make a repair visit more efficient while helping you avoid guesswork.

 OLO Auto Parts