Choosing replacement parts in 2026 requires more than comparing prices online. Drivers now weigh fit, material quality, warranty support, supplier reputation, and installation risks. A shiny product page may hide unclear specifications. That matters when a brake component, sensor, or suspension part must perform under heat, rain, and daily traffic.
Why are aftermarket parts popular among car owners? The reasons are practical. Many owners find broader product choices, competitive pricing, and faster availability than some original-equipment channels offer. Experienced repair professionals also value access to upgraded components, especially for older vehicles with limited factory support. Craig Van Batenburg, an automotive aftermarket educator and hybrid vehicle specialist, has emphasized the importance of informed repair decisions: “Knowledge is power when choosing parts and repairing vehicles.” His point remains relevant in 2026. A lower price is not automatically a better value.
Look closely.
A reliable selection process begins with the vehicle identification number, exact engine details, and documented compatibility. Independent test results, clear warranty terms, traceable manufacturers, and verified customer feedback add useful evidence. Professional installation can prevent problems caused by incorrect torque, poor calibration, or unsuitable materials. I have seen buyers focus heavily on savings, then overlook return policies and technical support. That is an easy mistake. Some aftermarket products perform impressively, while others create extra labor and uncertainty. This guide will examine how to separate those choices, question confident marketing claims, and select parts that balance safety, durability, performance, and cost.
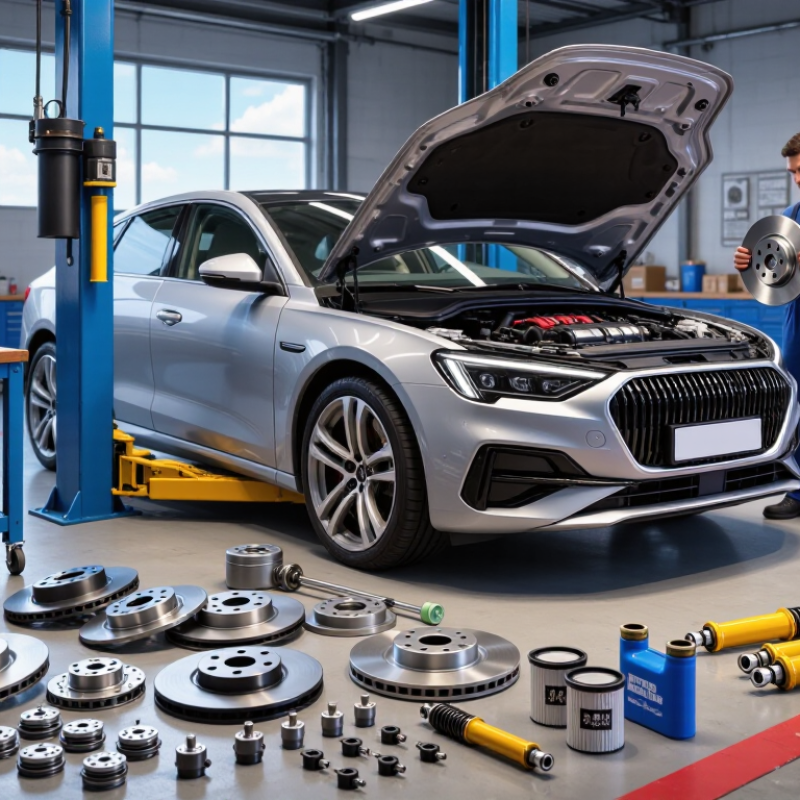
A correct part begins with a precise vehicle profile. Record the VIN, model year, production month, engine code, transmission, drivetrain, body style, and trim level. Do not rely on “fits most models.” Small differences can change mounting points, sensor plugs, or brake dimensions.
S&P Global Mobility reported that the average U.S. light-duty vehicle reached 12.6 years in 2024. Older vehicles often have mid-year revisions, making the production date especially important.
Measure before ordering. Check the old part’s length, bolt spacing, connector shape, thread size, and stamped identification number. Take clear photos beside a ruler. A visual match can mislead.
I have seen similar housings hide different pin layouts. That mistake wastes time. It can also create safety concerns.
Use the vehicle manufacturer’s parts catalog, a trusted repair database, and the supplier’s technical sheet together. Compare load ratings, material specifications, operating temperature, and certification details.
The Auto Care Association’s 2024 Joint Channel Forecast valued the U.S. automotive aftermarket at more than 500 billion dollars across major channels. That scale offers choice, but it also increases listing inconsistency.
Keep the evidence. Save catalog screenshots and confirm return conditions before payment.
I would recheck every critical part, especially steering, braking, suspension, and airbag-related components.
How to Choose Aftermarket Car Parts in 2026?
Vehicle age changes the buying decision. S&P Global Mobility reported an average U.S. light-vehicle age of 12.6 years in 2024. Older cars often need affordable repairs, but low price should not control every choice. OEM parts usually provide precise fitment and original specifications. They are sensible for airbags, braking systems, steering components, and advanced electronic sensors. Aftermarket parts can reduce costs, especially for filters, lamps, trim, and routine service items. Quality varies widely. Check testing evidence, material specifications, warranty terms, and verified vehicle compatibility.
Remanufactured parts deserve closer attention. A reputable remanufacturer should inspect, clean, measure, and replace worn internal components. Look for documented testing and clear core-return requirements. The International Automotive Remanufacturers Council reports that remanufacturing can use substantially fewer raw materials than producing new components. However, savings depend on the part category and process quality. A rebuilt starter may be practical, while a poorly documented electronic module could create repeated faults.
I have learned that the cheapest part is rarely the cheapest repair. A low-cost sensor caused a warning light to return after three weeks. That experience was not a perfect test, but it changed my checklist. Compare total cost, labor risk, delivery time, and warranty support. Keep the repair invoice and installation records. When safety, calibration, or software is involved, professional inspection remains worth the extra money.
Comparing OEM, aftermarket, and remanufactured replacement parts
How to read this chart: OEM parts generally provide the most consistent fit and broadest vehicle-specific validation, but they usually cost the most. Aftermarket parts offer the widest price range and can be a practical choice when specifications, certifications, and warranty terms are carefully checked. Remanufactured parts reuse tested components and often provide a balance between cost, performance, and environmental impact.
Scores use a 0–100 comparison scale. Cost is indexed against a typical OEM replacement part, where OEM = 100. The figures represent common industry ranges and should be verified against the specific part, vehicle, supplier warranty, and installation requirements.
How to Choose Aftermarket Car Parts in 2026?
Compatibility should be verified before price enters the discussion. Check the vehicle identification number, model year, engine type, trim level, and production date. Two cars with the same badge may use different connectors or mounting points. Compare the part number with the vehicle manufacturer’s catalog, not only a marketplace description. Measure critical details when possible, including bolt spacing, hose diameter, and sensor position. A five-minute measurement can prevent an expensive return.
Quality evidence matters more than polished packaging. Look for clear material specifications, batch information, installation instructions, and traceable testing records. For braking, steering, suspension, and lighting components, review applicable safety certifications and independent test results. Safety ratings should match the actual part category. A crash rating for a vehicle does not automatically validate a replacement component. Ask a qualified technician to inspect unclear claims. Their practical experience can reveal weak welds, brittle plastics, or poor sealing that photos hide.
I once trusted a familiar shape and skipped the connector check. It did not fit. That mistake was avoidable. During installation, compare the new part beside the removed one, then inspect clearance and fastener seating. Listen for unusual vibration after a cautious test drive. Keep the invoice and technical documents. Some information may still be incomplete, and that deserves a second check. Reliable choices come from matching evidence, measurements, and real-world inspection.
A careful seller matters more than a dramatic discount. S&P Global Mobility reported that the average U.S. vehicle age reached 12.6 years in 2024. Older cars often need several replacement parts, so compatibility details must be precise. Check the seller’s physical address, technical support, fitment tools, and customer reviews. I also compare the part number with the vehicle’s engine code. It takes minutes. It can prevent an expensive mistake.
Warranty language deserves close attention. Look for coverage length, labor exclusions, shipping responsibilities, and proof-of-installation requirements. A low-priced sensor is not truly cheap if returning it requires specialist testing.
The National Retail Federation and Appriss Retail reported $743 billion in U.S. retail returns during 2023, representing 14.5% of sales. That figure shows how important return systems have become. Read the deadline carefully. Some sellers accept unopened parts only, while others charge restocking fees. I once trusted a vague “easy returns” promise and missed a hidden electrical-part exclusion. That was my error.
Compare the final cost, not the listing price. Include shipping, taxes, core charges, tools, and possible return postage. Save screenshots of the product page and warranty before ordering. Ask support one specific question about fitment. Their response reveals competence.
Still, even strong reviews can mislead; vehicle modifications and regional specifications create exceptions. A documented policy is safer than confidence.
Before buying an aftermarket car part in 2026, confirm how it will be installed. A part can look identical yet require different brackets, wiring, or software calibration. Check the vehicle’s exact year, engine, trim, and production date against the fitting data. Then ask a qualified technician to inspect the mounting points and existing components. I have seen simple replacements become expensive when a corroded connector was ignored. Fitment is not just a catalog number.
Request a written installation estimate, including labor hours, special tools, programming, fluids, seals, and disposal fees. Some parts need a lift or electronic calibration, while others use ordinary hand tools. Never assume “plug and play.” That assumption can hurt. Ask whether installation affects nearby components or scheduled service intervals. A repair professional should explain the procedure clearly. They should also identify safety checks after installation, including torque verification, leak testing, or a road test.
Long-term cost deserves equal attention. Compare service intervals, replacement filters, lubrication needs, corrosion protection, and expected wear. A cheaper component may need frequent adjustment, creating higher labor costs over three years. Keep invoices and installation records; they help trace recurring faults and guide maintenance decisions. I would also price one realistic failure, not only the best-case lifespan. My own estimates have been too optimistic when winter moisture and poor road surfaces were involved. Recheck the part after the first few hundred miles, because early noise or uneven wear is useful evidence.
| Part Category | Typical Installation Requirement | Typical Labor Time | Tools, Calibration, or Special Checks | Expected Service or Inspection Interval | Estimated 5-Year Maintenance Cost | Key Selection Considerations |
|---|---|---|---|---|---|---|
| Engine Air Filter | Usually DIY-friendly Access the air-filter housing and replace the filter element. |
0.2–0.5 hour | Basic hand tools; confirm correct filter orientation and housing seal. | Inspect at each scheduled service; commonly replace every 12,000–30,000 miles, depending on dust and driving conditions. | US$30–US$120 | Choose the correct dimensions, sealing surface, filtration rating, and airflow specification. |
| Cabin Air Filter | Usually DIY-friendly Often located behind the glove box or beneath the dashboard. |
0.3–0.8 hour | Minimal tools; check airflow direction and ensure the cover is fully secured. | Inspect annually; commonly replace every 12,000–15,000 miles or sooner in heavy traffic or dusty areas. | US$40–US$160 | Compare particulate filtration, activated-carbon capability, fit, and resistance to moisture. |
| 12-Volt Battery | Moderate Disconnect and reconnect terminals in the correct sequence; some vehicles need electronic reset procedures. |
0.5–1.0 hour | Battery memory saver may be useful; test charging voltage and confirm terminal compatibility. | Test at least annually; typical replacement life is about 3–5 years, affected by climate and usage. | US$180–US$450 | Match battery group size, capacity, terminal layout, chemistry, and required registration or reset procedure. |
| Brake Pads and Rotors | Moderate Wheel removal, caliper work, rotor inspection, and post-installation brake testing. |
1.5–3.5 hours per axle | Torque wrench, safe vehicle support, brake-service tools, and electronic parking-brake service mode where applicable. | Inspect at every tire rotation or scheduled service; pad life commonly ranges from 20,000–60,000 miles. | US$450–US$1,400 | Verify axle compatibility, friction material type, rotor dimensions, noise control, and bedding instructions. |
| Tires and Tire-Pressure Sensors | Professional installation recommended Mounting, balancing, valve servicing, and pressure-monitoring reset may be required. |
1.0–2.0 hours for four tires | Tire machine, wheel balancer, correct tire-pressure specification, and sensor relearn equipment. | Check pressure monthly; rotate approximately every 5,000–8,000 miles when recommended; replace based on tread, age, and damage. | US$650–US$1,800 | Match size, load index, speed rating, seasonal application, tread pattern, and sensor compatibility. |
| Wheel Bearing or Hub Assembly | Professional installation recommended Requires wheel, brake, and hub removal; some designs require pressing or sensor handling. |
1.5–4.0 hours per wheel | Torque specifications, puller or press equipment, bearing preload checks, and possible ABS fault-code scan. | No fixed replacement interval; inspect for noise, looseness, vibration, or uneven wear during routine service. | US$500–US$1,600 | Confirm axle position, ABS sensor design, flange dimensions, bearing preload, and corrosion resistance. |
| Shock Absorbers or Struts | Professional installation recommended Strut replacement may involve spring compression and suspension alignment. |
2.0–5.0 hours per axle | Spring compressor where required, torque wrench, ride-height inspection, and alignment check after installation. | Inspect around 50,000 miles and during suspension service; replacement depends on leakage, bounce, handling, and wear. | US$700–US$2,400 | Compare complete assemblies versus bare units, spring rate, ride height, damping behavior, and alignment requirements. |
| Alternator | Professional installation recommended Battery disconnection, belt removal, electrical testing, and charging-system verification are required. |
1.5–4.0 hours | Charging-system tester, belt-tension inspection, correct electrical connector, and post-installation voltage test. | No universal replacement interval; test when warning lights, low voltage, dimming lights, or starting problems occur. | US$450–US$1,500 | Match amperage, pulley design, connector configuration, mounting points, and compatibility with vehicle energy management. |
| Radiator | Professional installation recommended Coolant draining, hose and fan clearance checks, refilling, bleeding, and leak testing are required. |
3.0–6.0 hours | Cooling-system pressure tester, correct coolant specification, air-bleeding procedure, and temperature verification. | Inspect hoses and coolant condition at scheduled service; coolant replacement commonly follows the vehicle’s specified time or mileage interval. | US$600–US$1,800 | Verify core dimensions, transmission-cooler connections, material quality, fan-shroud fit, and corrosion protection. |
| Oxygen Sensor | Moderate Sensor removal may be difficult because of heat and corrosion; wiring routing must be preserved. |
0.8–2.0 hours | Scan tool, suitable sensor socket, anti-seize only where specified, and emissions-system fault-code verification. | No fixed interval; inspect when the engine warning light, fuel-economy decline, or emissions fault appears. | US$250–US$900 | Match sensor position, connector, wire length, heating circuit, emissions specification, and calibration compatibility. |
| Water Pump | Professional installation recommended Access may require belt or timing-system removal, coolant service, and careful sealing. |
3.0–10.0 hours | Cooling-system pressure test, correct sealant or gasket, belt-tension checks, and air-purging procedure. | No universal interval; inspect for coolant leakage, bearing noise, overheating, or pump-shaft play. | US$700–US$2,500 | Confirm engine code, pump drive type, impeller construction, gasket quality, and whether related timing components should be serviced together. |
| Timing Belt Kit | Professional installation required Precise engine timing, tensioning, and component alignment are essential. |
4.0–10.0 hours | Engine-specific locking tools, torque specifications, timing verification, and often water-pump replacement. | Follow the vehicle manufacturer’s mileage or time interval; many systems require service within a defined range rather than by symptoms. | US$900–US$3,000 | Prefer a complete matched kit with belt, tensioner, idlers, and required seals; verify engine code and service interval. |
Cost note: The five-year figures are broad planning estimates in U.S. dollars for parts, routine inspections, and typical independent-repair labor. Actual costs vary by vehicle design, location, labor rate, mileage, climate, driving conditions, and the condition of related components. Always confirm the vehicle-specific service manual, installation instructions, torque values, and warranty terms before purchase.
Older vehicles often need affordable repairs, but price should not control every choice. Fit matters more.
Choose them for airbags, brakes, steering, and advanced sensors. These systems may require exact fitment, calibration, or software support.
Aftermarket filters, lamps, trim, and routine service items can reduce costs. Quality varies widely. Check materials, testing, warranty terms, and compatibility.
A reliable process includes inspection, cleaning, measurement, and replacement of worn internal parts. Look for documented testing and clear core-return instructions. Not every rebuilt part is equally dependable.
Check the vehicle identification number, model year, engine, trim, and production date. Compare part numbers with a technical catalog. Also measure bolt spacing, hose diameter, or connector position when possible.
Look for material specifications, batch details, installation instructions, and traceable test records. For safety components, review relevant certifications and independent testing. Packaging alone proves little.
Check coverage length, labor exclusions, shipping duties, testing requirements, and return deadlines. Some sellers accept only unopened electrical parts. Read the small details.
Include shipping, taxes, core charges, tools, labor, and possible return postage. A cheap sensor can become expensive after repeated installation. I learned this the hard way.
Compare the new part beside the removed one before fitting it. Check clearance, connectors, fasteners, sealing, and unusual vibration during a cautious test drive. Keep every record.
Choosing aftermarket car parts in 2026 starts with identifying your vehicle’s exact requirements, including the model year, engine type, trim, and specific part number. Drivers should compare OEM, aftermarket, and remanufactured options based on fit, durability, performance, and intended use. Why are aftermarket parts popular among car owners? They often provide broader selection, competitive pricing, and practical alternatives for both routine repairs and upgrades. However, lower cost should never outweigh safety or reliability.
Before purchasing, verify compatibility, quality certifications, safety ratings, materials, and product testing information. Evaluate the seller’s reputation, warranty coverage, return policy, shipping terms, and customer support. It is also important to calculate the complete cost, including tools, labor, programming, and future maintenance. Some parts may require professional installation or additional adjustments, while poor-quality components can create higher long-term expenses. A careful comparison of specifications, total ownership costs, and installation requirements can help car owners choose dependable parts that suit their vehicle and budget.
OLO Auto Parts